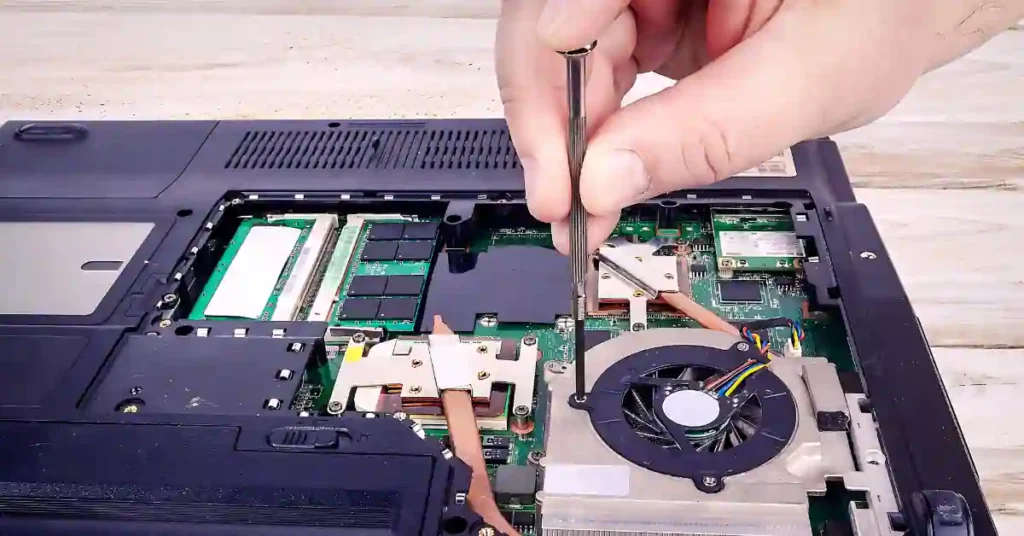
In today’s digital age, laptops have become an essential tool for work, entertainment, and communication. However, with extended use, laptops can accumulate dust and debris, leading to overheating and reduced performance.
One crucial component that often requires maintenance is the laptop fan. Cleaning your laptop fan regularly can help prevent overheating, improve airflow, and extend the lifespan of your device.
In this guide, we will walk you through the steps of How to Clean a laptop Fan effectively and promote optimal system performance and longevity.
Why Cleaning Your Laptop Fan is Important
The fan in your laptop plays a vital role in keeping the internal components cool by circulating air and dissipating heat. Over time, dust and dirt can accumulate on the fan blades and vents, obstructing airflow and causing the fan to work harder than necessary.
This can lead to overheating, reduced performance, and even hardware damage. By cleaning your laptop fan regularly, you can maintain optimal performance and prevent potential issues.
Signs Your Laptop Fan Needs Cleaning
Before we delve into the cleaning process, it’s essential to recognize the signs that indicate your laptop fan needs attention. Some common signs include:
- Loud fan noise: If you notice an increase in fan noise or unusual sounds coming from your laptop, it could be a sign that the fan is working harder due to dust buildup.
- Overheating: If your laptop feels excessively hot to the touch or shuts down unexpectedly, it may be due to poor airflow caused by a dirty fan.
- Frequent crashes: Overheating can cause your laptop to crash or freeze regularly, indicating a need for fan cleaning.
If you experience any of these symptoms, it’s time to clean your laptop fan.
what tools are needed to clean a laptop fan
Cleaning your laptop fan is an essential maintenance task to ensure your device runs efficiently and quietly. To perform this task, you’ll need a few basic tools.
- Small screwdrivers: To open your laptop.
- Soft cloth: To wipe off dust.
- Soft brush: To gently clean the fan.
- Toothpick or plastic tool: To remove debris.
- Compressed air (optional): To blow away dust.
- Anti-static mat (optional): To work on a safe surface.
Remember, be gentle and avoid using a vacuum cleaner to prevent damage.
How to Clean Laptop Fan Step-by-Step Guide
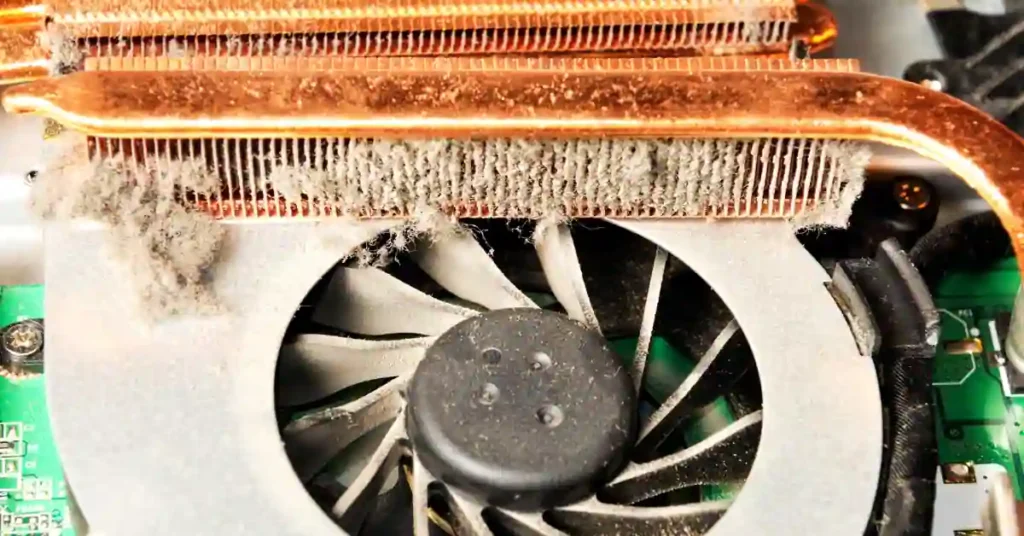
Is your laptop sounding like an airplane lately? It might be dirty inside! Dust can build up in the fan, making your computer work extra hard to stay cool. This can make your laptop hot, slow, and even shut down. But don’t worry, cleaning the fan is easy!
1. Prepare Your Workspace
Before you begin, gather the necessary tools for cleaning your laptop fan. You will need a small Phillips screwdriver, a compressed air canister, a soft brush or cotton swabs, and a clean, lint-free cloth. Additionally, ensure you work in a well-lit, static-free area to prevent damage to your laptop.
2. Power Off and Unplug Your Laptop
To avoid any risk of electric shock or damage to your laptop, make sure to power off your device and unplug it from the charger before starting the cleaning process. Allow the laptop to cool down for a few minutes before proceeding.
3. Locate the Fan Vent
Most laptops have a fan vent located on the side or bottom of the device. Refer to your laptop’s user manual or manufacturer’s website to identify the exact location of the fan vent.
4. Remove the Bottom Panel
Using a small Phillips screwdriver, carefully remove the screws securing the bottom panel of your laptop. Place the screws in a safe location to prevent loss. Gently lift off the bottom panel to access the internal components.
5. Clean the Fan Blades
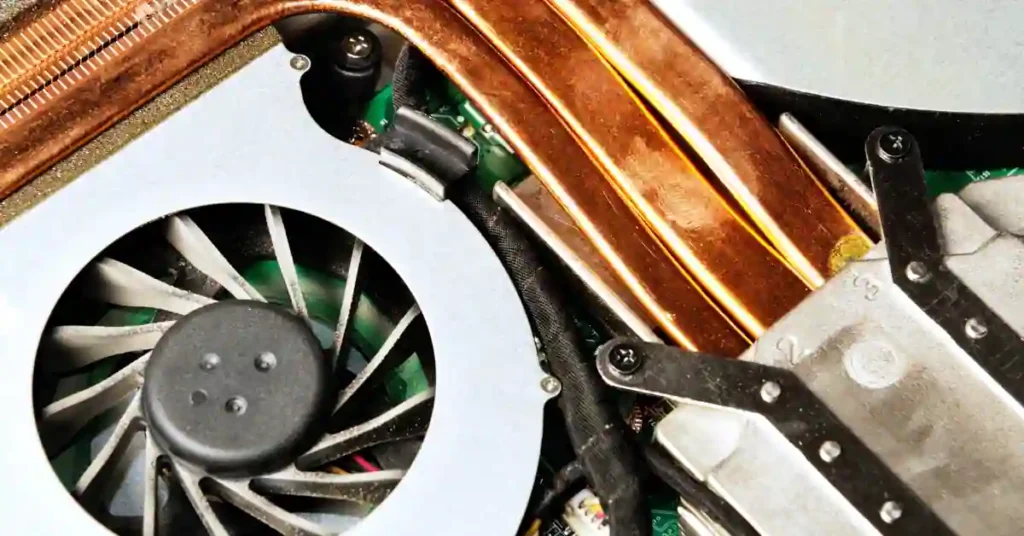
Locate the fan inside your laptop and inspect the fan blades for dust and debris. Use a can of compressed air to blow away the dust from the fan blades and surrounding components. Hold the can upright and use short bursts to avoid liquid from the canister entering the laptop.
6. Clean the Vents
Next, use a soft brush or cotton swab to clean the fan vents and surrounding areas. Remove any visible dust or debris that may be obstructing airflow. Be gentle to avoid damaging the delicate components.
7. Reassemble Your Laptop
Once you have cleaned the fan and vents thoroughly, carefully reattach the bottom panel of your laptop and secure it with the screws. Ensure all screws are tightened properly to prevent any loose components.
8. Test Your Laptop
Power on your laptop and listen for any changes in fan noise. Check the temperature of your laptop during use to ensure that the cleaning process has improved airflow and reduced overheating.
what are the common causes of laptop fan failure
The common causes of laptop fan failure include:
- Dust Buildup: Dust accumulation inside the laptop can obstruct airflow, causing the fan to work harder and potentially leading to premature failure.
- Debris Accumulation: Foreign objects like pet hair, food particles, or lint can clog the fan, impeding its rotation and causing overheating.
- Insufficient Maintenance: Neglecting to clean the fan vents and internal components allows dust and debris to accumulate, leading to fan failure.
- Overworking the Fan: Running resource-intensive applications or keeping multiple programs open simultaneously can strain the fan, increasing the risk of failure.
- Manufacturing Defects: In some cases, fan failures can be attributed to poor design, inadequate materials, or improper assembly during manufacturing.
- Age and Wear: Over time, the fan components can wear out, leading to noise, reduced performance, or complete failure due to natural wear and tear.
- Power Supply Issues: Problems with the laptop’s power supply can also contribute to fan failure, such as disconnected wires affecting the fan’s power source.
- Poor Cooling Design: Inadequate ventilation systems in laptops can lead to fans being overworked, components overheating, and ultimately, fan failure.
Understanding these common causes of laptop fan failure can help users take preventive measures to maintain optimal cooling and extend the lifespan of their laptop’s fan.
Regular cleaning, monitoring temperatures, avoiding ventilation blockages, and seeking professional assistance when needed are key steps to prevent fan failure and ensure the proper functioning of the laptop.
Related :- Why Is My Laptop Overheating?
How to Clean a Laptop Without Compressed Air
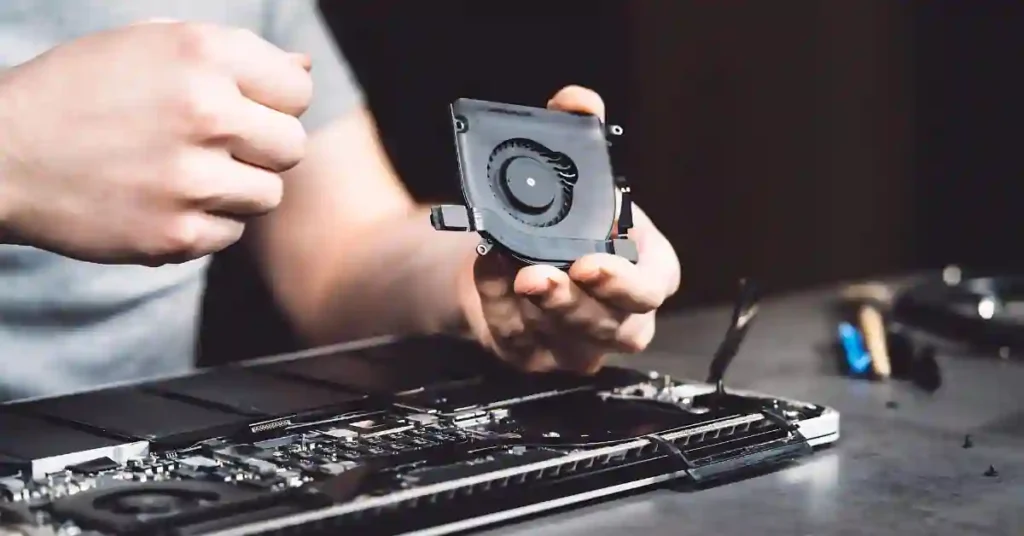
If your laptop has been running hot or noisy, it’s probably time to give it a good cleaning. While compressed air is a popular tool for this task, you might not have a can handy. No worries! You can still effectively clean your laptop fan without it. Here’s How to Clean a Laptop Without Compressed Air:
Step-by-Step Cleaning Process:
1. Power Down and Unplug:
First things first, turn off your laptop and unplug it from any power source. If possible, remove the battery to ensure maximum safety.
2. Open the Laptop:
Flip your laptop over and use the Phillips screwdriver to remove the screws holding the bottom panel. Carefully lift the panel off to expose the internals.
3. Use a Soft Brush:
Take your soft brush or small paintbrush and gently dust off the fan blades and surrounding areas. Brushes can reach into tight spots and loosen dust without causing damage.
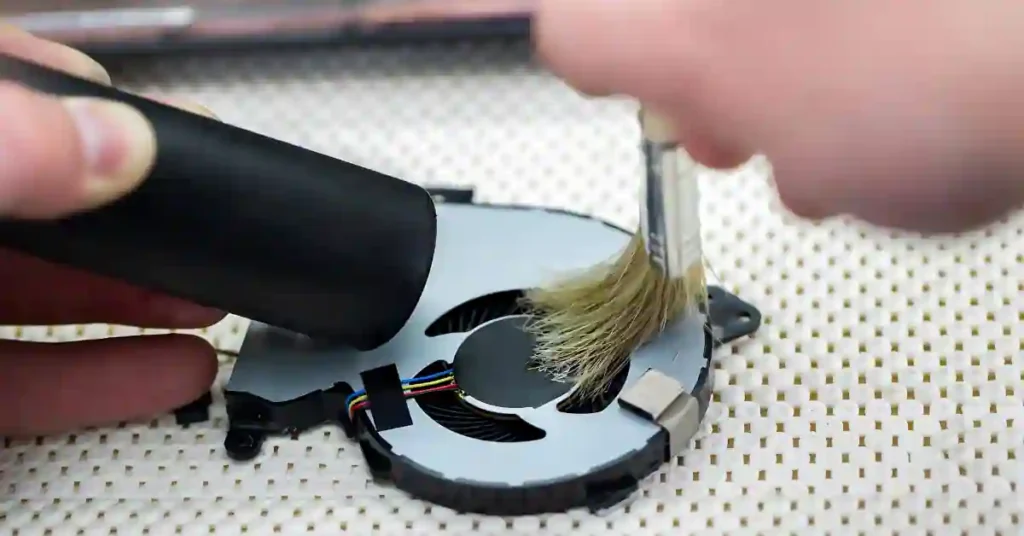
4. Clean with Cotton Swabs:
For more detailed cleaning, use cotton swabs. If there’s stubborn dirt or residue, dampen the swab with rubbing alcohol and gently clean the fan blades and other components.
5. Vacuum Cleaner Method:
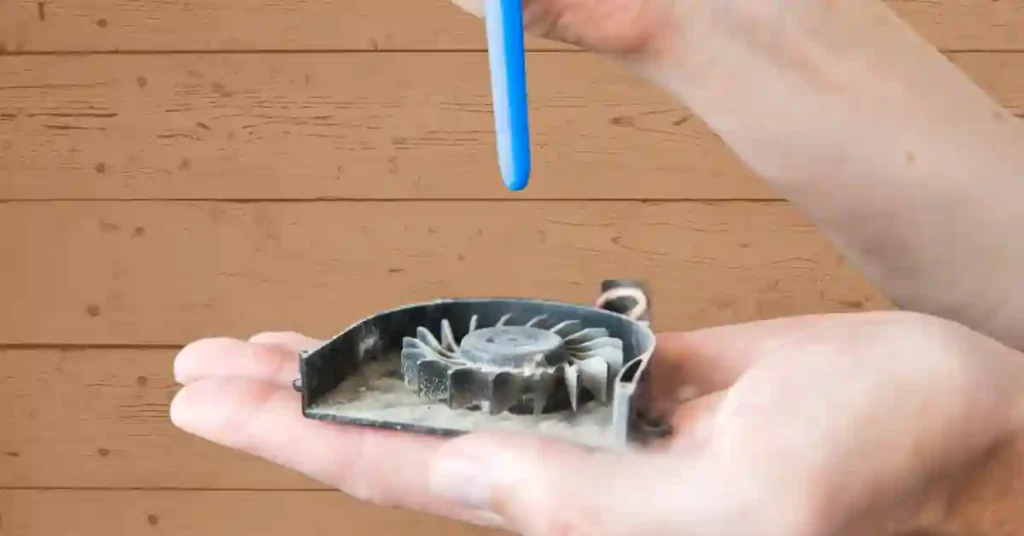
If you have a vacuum cleaner with a brush attachment, you can use it to carefully suck out the dust. Be sure to keep the vacuum at a safe distance to avoid any damage to delicate parts.
6. Wipe Down the Exterior:
Use a lint-free cloth to wipe down the exterior of your laptop, especially around the vents and openings. This helps prevent dust from getting back inside once you close it up.
7. Reassemble the Laptop:
After cleaning, carefully replace the bottom panel and screw it back into place.
8. Power Up and Test:
Reinsert the battery if you remove it, plug in your laptop, and turn it on. Listen for any unusual noises and check if it’s running cooler.
Additional Tips:
- Regular Maintenance: Aim to clean your laptop every 6-12 months to prevent dust buildup.
- Work in a Clean Area: Clean in a dust-free environment to avoid introducing more dust to your laptop.
- Stay Grounded: To avoid static damage, use an anti-static wrist strap or periodically touch a grounded metal object.
By following these steps and using these tools, you can keep your laptop fan clean without compressed air, ensuring your device stays cool and runs efficiently. Happy cleaning, and may your laptop perform at its best!
How to Clean a Laptop Fan Without Opening It
Is your laptop getting hot or sounding like a mini jet engine? Dust buildup in the fan can cause these issues, but what if you’re not comfortable opening up your laptop? No worries! You can still clean the fan without taking your laptop apart. Here’s how:
Tools You’ll Need:
- Compressed Air: This is the most effective tool for cleaning without opening up your laptop.
- Vacuum Cleaner: With a nozzle attachment to suck out dust.
- Soft Brush: A small, soft brush like a makeup brush for gently cleaning the exterior vents.
- Lint-Free Cloth: For wiping down the exterior.
Step-by-Step Cleaning Process:
1. Turn Off and Unplug:
First, make sure your laptop is powered down and unplugged from any power source. Safety first!
2. Find the Air Vents:
Locate the air vents on your laptop. These are usually found on the sides or bottom of the laptop. These vents allow airflow to cool your laptop.
3. Use Compressed Air:
Hold the can of compressed air upright to avoid any liquid discharge. Use short bursts to blow air into the vents. This can dislodge dust and push it out of the laptop. Aim the air at different angles to get the best results. Be sure to hold the laptop at an angle where the dust can escape easily.
4. Vacuum Cleaner:
If you don’t have compressed air, a vacuum cleaner can be a good alternative. Use a nozzle attachment to suck out dust from the vents. Be gentle and keep the vacuum at a safe distance to avoid damaging any internal components.
5. Soft Brush:
Gently brush around the vents with a soft brush to dislodge any stubborn dust. Be careful not to push dust further into the vents.
6. Wipe Down:
Use a lint-free cloth to wipe down the exterior of the laptop, especially around the vents, to remove any dust that may have settled there.
Additional Tips:
- Regular Maintenance: Cleaning your laptop vents every few months can prevent significant dust buildup.
- Work in a Clean Environment: Perform this cleaning in a dust-free area to avoid introducing more dust into your laptop.
- Elevate Your Laptop: Use a laptop stand to improve airflow and reduce dust accumulation in the future.
Cleaning your laptop fan without opening it can help reduce overheating and noise, improving the overall performance of your device. While this method isn’t as thorough as opening the laptop, it’s a great way to maintain your laptop without the risk of damaging internal components.
Conclusion
Regularly cleaning your laptop fan is a simple yet effective way to maintain optimal performance and prevent overheating. By following the steps outlined in this guide, you can ensure that your laptop remains cool, quiet, and reliable for years to come.
Remember to clean your laptop fan at least every 3-6 months or more frequently if you use your laptop in dusty environments. Your laptop will thank you with improved performance and longevity.
If you found this guide helpful, don’t forget to subscribe to our newsletter for more tech tips and tutorials. Keep your laptop running smoothly and enjoy your computing experience!
Q. What is the best way to clean a laptop without opening it?
If you want to clean your laptop without opening it, you can use a vacuum cleaner with both suction and blower functions. Start by using the suction near the fan vents and bottom inlets to remove dust. Then, switch to the blower function and blow air in the same areas to dislodge any remaining dust. Be sure to use the precision nozzle attachment for more accurate blowing. However, avoid blowing air directly into the fans for too long to prevent them from spinning at higher than specified RPM, which could potentially damage the motherboard due to static electricity. It’s also a good idea to disconnect the battery before cleaning. Lastly, be careful not to break any fan blades during the process to avoid further problems with the laptop’s cooling system. By following these steps and precautions, you can effectively clean your laptop and improve its performance without the need to open it up.
Q. How to clean a Lenovo laptop fan without opening it?
To clean your Lenovo laptop fan without opening it, start by gathering some basic supplies: compressed air, a soft brush, cotton swabs, and a lint-free cloth. First, power off your laptop and unplug it. Locate the air vents on your Lenovo – they’re usually on the sides or back. Use the compressed air to blow short bursts into the vents, dislodging any dust or debris. Then, gently brush away any remaining dust with the soft brush. For stubborn dirt, dip cotton swabs in alcohol and carefully clean the fan blades and surrounding areas. Wipe down the laptop’s exterior with the lint-free cloth to remove any remaining dust or residue. Finally, power on your laptop and listen for any unusual sounds to ensure the fan is functioning properly. With these simple steps, you can keep your Lenovo laptop fan clean and running smoothly without the need to open it up.


